
Website security is not optional — compromised hosting accounts can be used to send spam, host phishing pages, or attack other servers, resulting in your site being blacklisted or your hosting account suspended. cPGuard is a comprehensive security suite available in DirectAdmin that actively scans your hosting files for malware, detects PHP web shells, blocks brute force login attempts, and generates security reports. This guide shows you how to use it effectively.
What Is cPGuard?
cPGuard is a commercial security plugin for web hosting control panels including DirectAdmin. It integrates directly into your hosting account and provides multiple layers of protection for your website files and login systems. Unlike traditional antivirus software that runs on a desktop, cPGuard runs on the server side — scanning all files in your hosting account for malicious code, unauthorized scripts, and known malware signatures.
cPGuard is developed by OwlH and is widely deployed across hosting providers as a proactive security layer, complementing existing firewall and intrusion detection systems.
Key Features of cPGuard
cPGuard provides several core security capabilities:
- Malware Scanner — Scans all files in your hosting account against a database of known malware signatures. Detects infected PHP files, JavaScript injections, and malicious HTML files commonly deployed by attackers.
- PHP Shell Detection — Specifically identifies PHP web shells — unauthorized scripts that give attackers remote control over your server. Web shells are a major threat because they are often disguised as legitimate-looking files.
- Brute Force Protection — Monitors login attempts to your website's admin panels (such as WordPress wp-admin) and automatically blocks IP addresses that make too many failed login attempts in a short time.
- Security Reports — Generates detailed reports showing detected threats, blocked attacks, and scan history so you can track your account's security status over time.
Enabling cPGuard in DirectAdmin
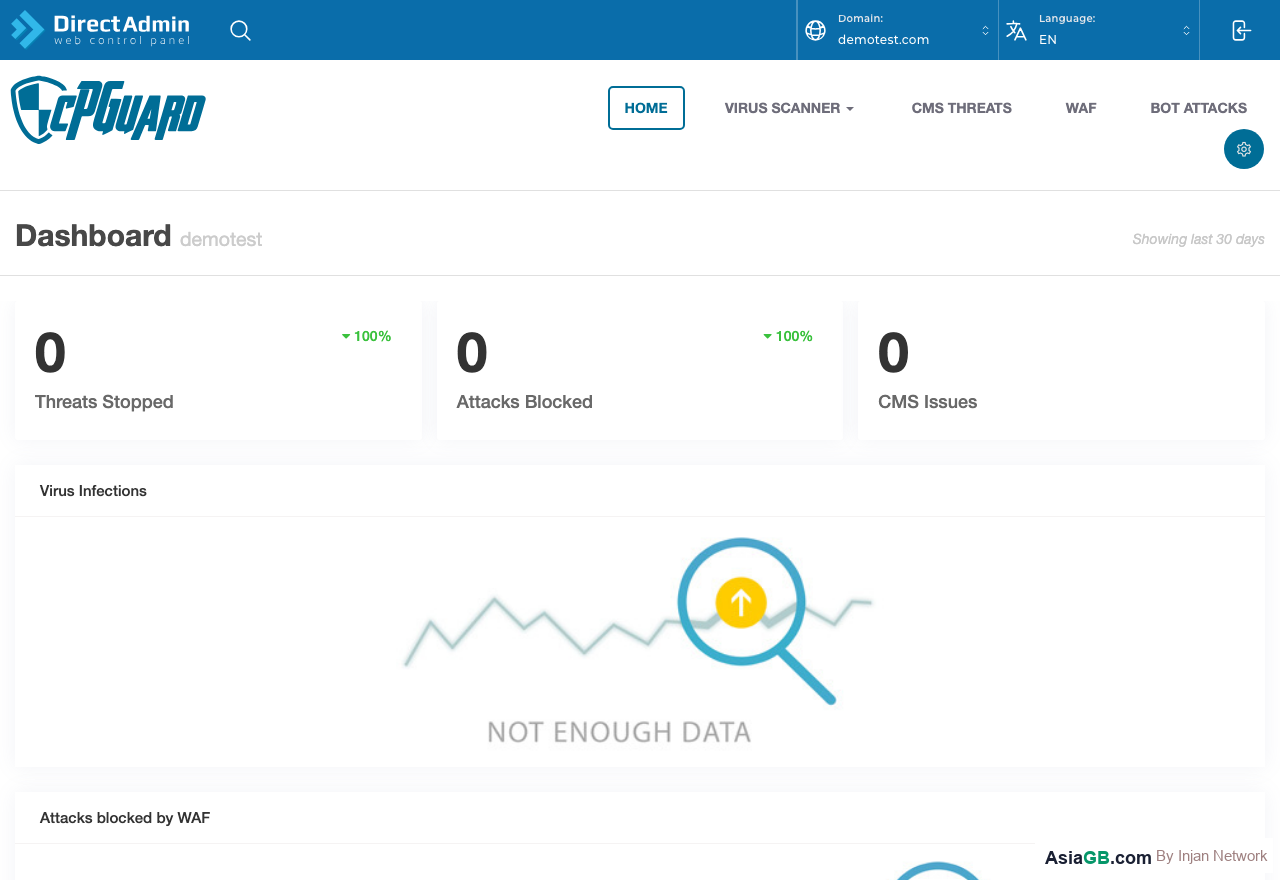
To access cPGuard, log in to DirectAdmin and navigate to the Extra Features section. Click on cPGuard. The cPGuard dashboard will open showing your current security status, recent scan results, and any active threats detected. If this is your first time opening cPGuard, you may need to accept the terms and enable the service for your account.
How to Run a Malware Scan
To manually initiate a malware scan of your hosting files:
- Open the cPGuard dashboard from DirectAdmin.
- Navigate to the Malware Scanner section.
- Click Start Scan to begin scanning all files in your account.
- The scan will run in the background. Depending on how many files you have, it may take a few minutes to complete.
- Once the scan finishes, a results summary will show the number of clean files and any infected files detected.
Reading Security Reports
The cPGuard Reports section shows a history of all scans, detected threats, and blocked brute force attempts. Each report entry includes:
- The file path of any detected malware
- The type of threat detected (e.g., PHP shell, JavaScript injection, backdoor)
- The date and time the threat was found
- The action taken (quarantined, deleted, or flagged for review)
Handling Detected Malware
When cPGuard detects a malicious file, you have several options:
- Quarantine — Moves the file to a safe quarantine folder where it cannot execute but is preserved for review.
- Delete — Permanently removes the file from your hosting account.
- Ignore — Marks the file as a false positive if you are confident it is safe (use with caution).
After handling detected malware, always change your CMS admin password and FTP password, and update all plugins and themes to eliminate the vulnerability that allowed the infection.
Managing Quarantined Files
When cPGuard moves a file to quarantine, the file is isolated in a secure directory where it cannot be executed by the web server. This prevents the malicious code from doing further damage while you decide how to handle it. You have three options for each quarantined file:
- Delete permanently — The safest action for confirmed malware. The file is removed from your hosting account entirely. Use this when you are certain the file is malicious and not needed for your website to function.
- Restore to original location — Returns the file to where it was before quarantine. Use this only when you are confident the file was flagged as a false positive — for example, a legitimate custom PHP script that uses patterns resembling malware. Before restoring, open the file in File Manager and inspect its contents carefully.
- Whitelist the file — Adds the file to an exclusion list so that future scans skip it. Appropriate for recurring false positives that you have verified are safe but cPGuard keeps flagging. Use whitelisting sparingly, as it creates blind spots in your security scanning.
After cleaning up detected malware, take these follow-up steps to close the security gap that allowed the infection in the first place:
- Change your WordPress admin password (or whichever CMS you use)
- Change your FTP and DirectAdmin passwords
- Update all installed plugins, themes, and CMS core to the latest versions
- Remove any inactive or abandoned plugins that may have outdated code
- Check your file permissions — world-writable directories (777) are a common attack vector
Setting Up Auto-Scan and Email Alerts
Relying on manual scans means you only find malware when you remember to look. Configuring cPGuard to scan automatically on a schedule and send email alerts ensures you are notified as soon as a threat is detected, even if you have not logged into DirectAdmin for days.
To configure scheduled scanning:
- Open the cPGuard dashboard from DirectAdmin Extra Features.
- Navigate to the Settings or Scheduled Scan section.
- Set the scan frequency. Weekly is sufficient for most websites. Choose Daily if your site allows user-uploaded content, runs an online store with frequent uploads, or has a history of being targeted.
- Select the scan scope — in most cases, scan your entire
public_htmldirectory including all subdirectories. - Enter the notification email address where you want alert reports sent.
- Save the settings.
cPGuard will send an email report after each scheduled scan summarising the number of files scanned, threats detected, and actions taken. If no threats are found, you may receive a clean report or no email at all depending on your notification settings. Either way, the scan has run in the background keeping your files monitored.
Security Best Practice: Run a malware scan at least once every week, especially after installing new plugins, themes, or third-party scripts. Many infections occur through vulnerable plugins, and catching them early prevents your domain from being blacklisted by Google or your hosting account from being suspended.
Best Practices for Getting the Most Out of cPGuard
Enabling cPGuard is just the first step. Configuring it thoughtfully and maintaining it over time is what makes the difference between surface-level protection and genuinely secure hosting. The following practices help you get the most effective results while avoiding false positives and alert fatigue.
Choose the Right Scan Schedule
The scan frequency you choose should reflect how often files change in your hosting account. For most websites that only update content occasionally, a weekly scan provides a good balance between security coverage and server resource use. For sites that accept user-generated content — such as community forums, marketplaces, or any site where customers can upload files directly — you should configure a daily scan, since the risk of a malicious file being uploaded is substantially higher. Schedule scans during off-peak hours, typically between 1am and 4am local time, to minimise any performance impact on your live site.
Set Alert Thresholds Appropriately
cPGuard can notify you when it detects threats at various severity levels. If you set the alert threshold too low, you will receive frequent notifications for minor issues and false positives — and you may start ignoring alerts altogether, which defeats the purpose. If you set it too high, cPGuard may detect genuine medium-severity threats without notifying you. A practical starting point is to alert on medium severity and above for general websites, and lower it to include low-severity findings if your site handles sensitive data or has previously been compromised.
Manage File Exclusions Carefully
The Whitelist or File Exclusions feature tells cPGuard to skip specific files or directories during scans. Use it sparingly and only when you have verified that the flagged file is genuinely a false positive. Common legitimate candidates for whitelisting include heavily minified third-party JavaScript files or custom PHP scripts that use patterns that superficially resemble obfuscation techniques. Avoid whitelisting entire directories such as wp-content/uploads, as that would leave all newly uploaded files completely unscanned. Always whitelist specific files by full path, and review your exclusion list every few months to remove entries that are no longer needed.
Keep Malware Signatures Up to Date
cPGuard's detection capability depends on the quality and freshness of its signature database. An outdated database will miss newly discovered malware strains. In most configurations, cPGuard updates its signatures automatically in the background. However, if you notice that the signature database version shown in the dashboard has not changed for several weeks, contact AsiaGB Support to verify that updates are running correctly on your server. Keeping signatures current is especially important after major security incidents in the WordPress plugin ecosystem, which can introduce new malware variants rapidly.
Alongside these cPGuard-specific practices, maintain good general security habits in parallel: update WordPress core, plugins, and themes whenever new versions are released; use strong, unique passwords for both WordPress admin and DirectAdmin; and run scheduled backups at least weekly. cPGuard is an excellent detection layer, but layered security — detection combined with prevention and recovery planning — gives your hosting account the most robust protection available.
Hosting with cPGuard Security Included
AsiaGB hosting includes cPGuard security on all plans — proactive malware protection and brute force blocking built right in.
View Hosting Plans