
A backup is the most important safety net for any website. Hardware failures, accidental file deletions, plugin conflicts, hacking incidents, and botched updates can all damage or destroy your site in seconds. DirectAdmin includes a built-in backup tool that lets you create complete snapshots of your hosting account — including files, databases, email, and DNS records — and restore them whenever you need to recover.
Why Backups Matter
Even if your hosting provider runs automatic server-level backups, you should always maintain your own copies. Server backups may not be granular enough to restore a single file or database table, and they may not run frequently enough for fast-changing sites. Having your own backup file means you can restore your exact state from any point in time you chose to save.
Common scenarios where backups save the day include:
- A WordPress update that breaks your theme or plugins
- A developer accidentally deleting files via FTP
- A database corruption after a failed script execution
- A security breach that injects malicious code into your files
- Migrating your website to a new hosting provider
What DirectAdmin Can Back Up
DirectAdmin's backup function covers four key data categories for your hosting account:
- Files — all files in your
public_htmlfolder and home directory, including website source code, images, configuration files, and .htaccess rules - Databases — full MySQL database dumps including all tables, data, and structure
- Email — email accounts, messages stored on the server, forwarders, autoresponders, and spam filter rules
- DNS Records — your domain's DNS zone file including A, CNAME, MX, TXT, and other records
Creating a Full Backup in DirectAdmin
- Log in to DirectAdmin and go to the Advanced Features section.
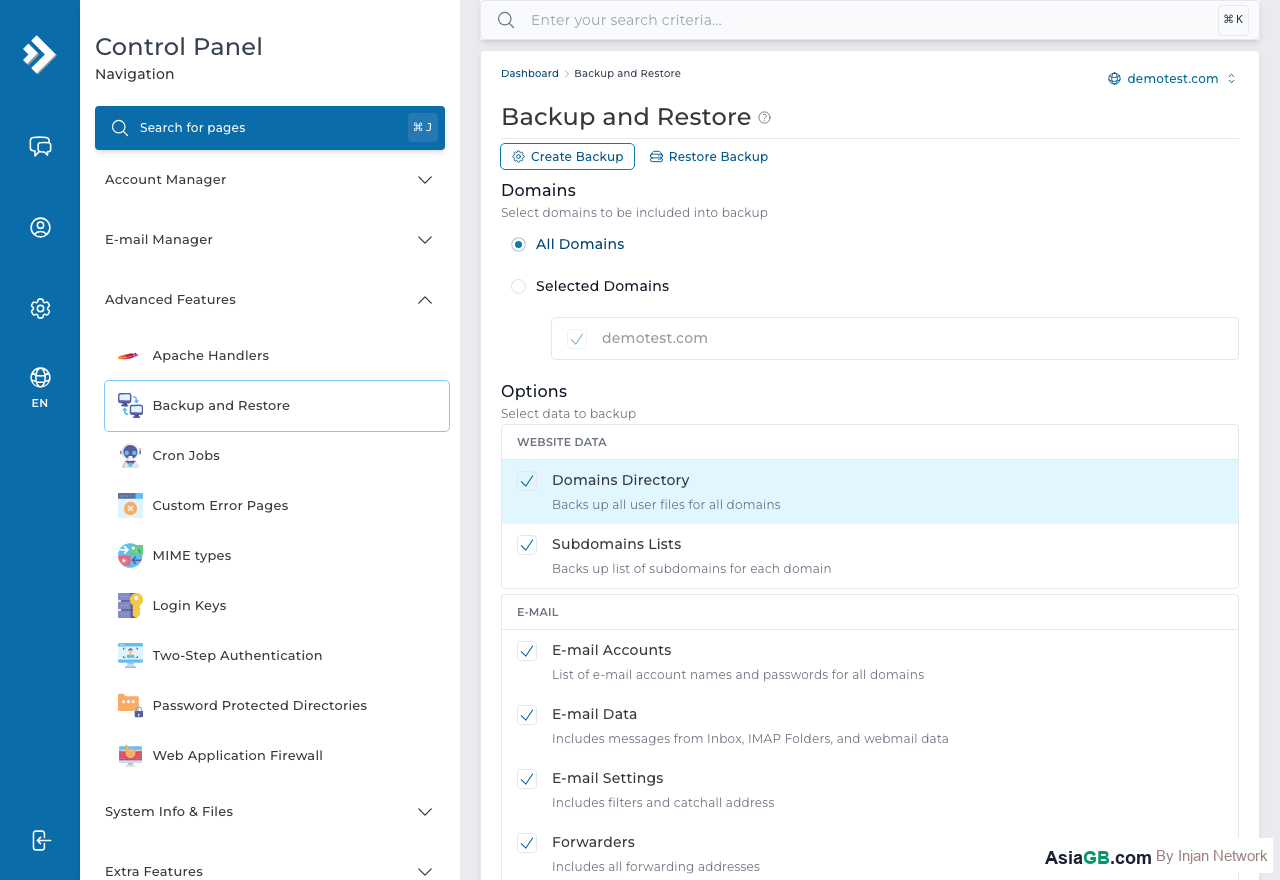
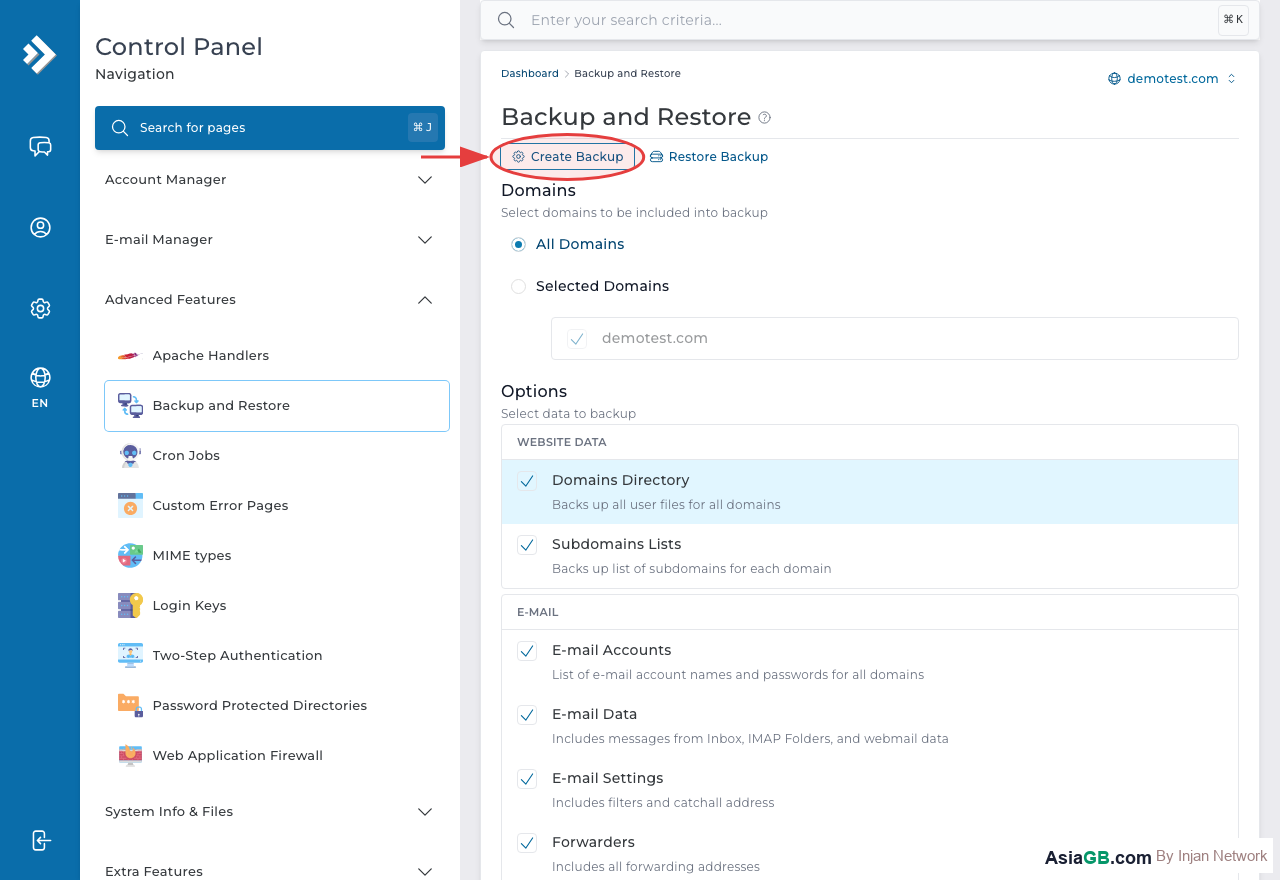
- Click on Create/Restore Backups.
- You will see checkboxes for each data category: Files, Databases, Emails, and DNS. Check all the items you want to include in this backup.
- Select the backup destination — typically your home directory (the default option stores the backup in
/home/username/backups/). - Click Create Backup. DirectAdmin will queue the backup job and notify you via email when it is complete.
- Depending on your site size, the backup may take a few minutes to several minutes to complete.
Downloading the Backup File
Once the backup is created, it will be stored as a compressed .tar.gz file in your account's backup directory. To download it to your local computer:
- Open the File Manager in DirectAdmin.
- Navigate to the
backupsfolder in your home directory. - Click on the backup file and select Download.
- Save the file to your local machine and store it in a secure location.
It is best practice to keep multiple backup copies in different locations — local storage, cloud storage (Google Drive, Dropbox), or an external hard drive.
Restoring from a Backup
If you need to restore your site from a backup, follow these steps:
- If the backup file is on your local computer, upload it back to your
backupsfolder via FTP or File Manager. - In DirectAdmin, go to Advanced Features → Create/Restore Backups.
- In the Restore section, you will see a list of available backup files in your backup directory.
- Select the backup file you want to restore from.
- Choose which data types to restore (Files, Databases, Email, DNS) — you can restore all or just specific components.
- Click Restore. DirectAdmin will overwrite the current data with the backup contents.
- Check your website after restoration to confirm everything is working correctly.
Scheduling Automatic Backups with Cron
For ongoing protection without manual intervention, you can schedule automatic backups using DirectAdmin's Cron Jobs feature. Create a cron job that triggers a backup script at regular intervals — for example, every night at 2:00 AM. Many hosting setups support a command-line backup trigger or a custom PHP/shell script that calls DirectAdmin's backup API. This ensures you always have a recent backup without remembering to do it manually.
Backup vs Snapshot
A backup in DirectAdmin creates an archive file of your data that you can download and store externally. A snapshot (if offered by your hosting provider) is a server-level point-in-time copy of the entire virtual disk, usually managed by the hypervisor. Snapshots are faster to create and restore but are not portable — you cannot download a snapshot and restore it on a different server. For migration and long-term archiving, the DirectAdmin backup file is the right choice.
The 3-2-1 Backup Strategy
The 3-2-1 rule is the industry-standard backup strategy recommended by data security professionals. It is simple to remember and provides protection against virtually every common failure scenario:
- 3 copies — Keep at least three copies of your data: the live version plus two separate backup copies. If one backup is damaged or corrupted, you still have another.
- 2 different media types — Store your backups on two different types of storage — for example, one copy on the server and another on an external hard drive or cloud storage. If one storage medium fails, the other survives.
- 1 copy off-site — Keep at least one copy in a location physically separate from your primary storage. Cloud services such as Google Drive, Dropbox, or Amazon S3 satisfy this requirement. Off-site storage protects against disasters like fire, flood, or theft that could destroy everything in one location.
Applying 3-2-1 to a typical DirectAdmin hosting account looks like this: an automated daily backup stored on the server (copy 1), a weekly manual download to your laptop or desktop (copy 2), and a monthly upload to cloud storage (copy 3, off-site).
Testing Your Backups with Restore Drills
A backup you have never tested is a backup you cannot rely on. Files can become corrupted silently, and you may only discover the problem when you actually need to restore — which is the worst possible moment to find out. Schedule a restore drill every one to three months to verify that your backups are intact and usable:
- Create a test subdomain (for example,
test.yourdomain.com) or use a spare hosting account as a staging environment. - Upload a recent backup file to that environment and run the restore process.
- Verify that the website loads correctly and that the database contains the expected content.
- Test key functionality — logins, contact forms, product pages — to confirm the restored site behaves like the live site.
- Delete the test environment once the drill is complete.
Spending 30–60 minutes on a restore drill every few months is a small investment that can save many hours — or days — of recovery work if a real emergency occurs.
Always Backup Before Updates: Before updating WordPress core, plugins, PHP versions, or making any significant configuration change, create a full backup first. Even routine updates can occasionally go wrong, and having a backup from just before the update means you can recover in minutes instead of hours.
Hosting with Daily Automatic Backups
AsiaGB hosting plans include daily server-level backups plus full DirectAdmin backup tools so you always have multiple recovery points.
View Hosting Plans