
The File Manager in DirectAdmin is one of the most convenient tools available to hosting users. It allows you to upload, download, edit, move, copy, and delete files directly through your web browser — no FTP client or SSH access required. Whether you need to quickly edit a configuration file, upload a new theme, or extract a ZIP archive, the File Manager lets you do it all without leaving your browser.
What Is the File Manager?
The File Manager is a browser-based file browser built into DirectAdmin. It gives you access to your entire hosting file system, from your website's public files to configuration files and email data. Think of it as a graphical interface for the files stored on your hosting server — similar to Windows Explorer or macOS Finder, but running in your browser and operating on your remote server files.
Because it runs completely in your browser, you can manage your hosting files from any device — your desktop computer, laptop, or even a tablet — as long as you have access to your DirectAdmin login.
Accessing the File Manager in DirectAdmin
To open the File Manager, log in to your DirectAdmin control panel and look for the System Info & Files section. Click File Manager. The file manager interface will open, showing your home directory.
Alternatively, you can navigate directly by typing your DirectAdmin URL followed by /filemanager in your browser address bar.
Understanding the Folder Structure
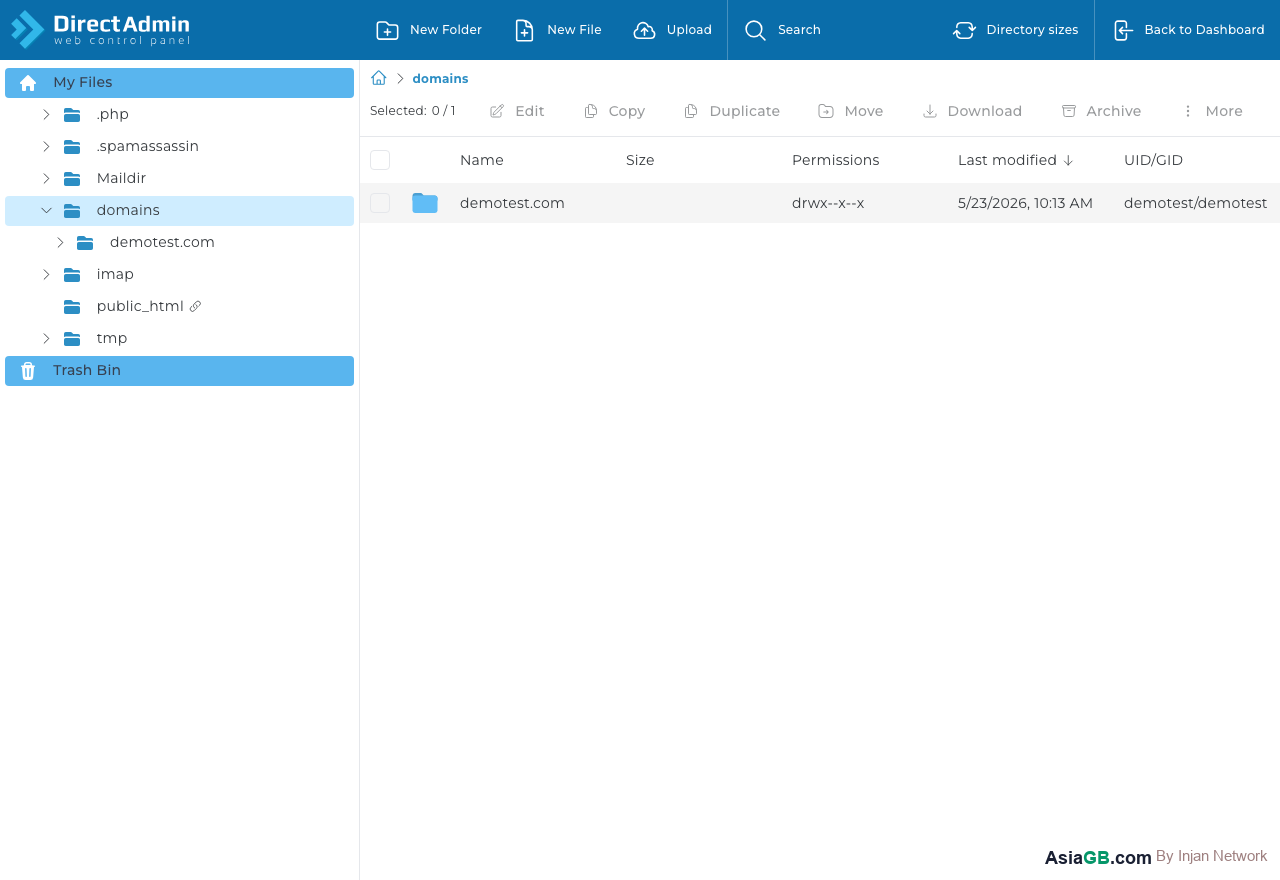
When the File Manager opens, you will see several important directories. Understanding what each folder is for helps you work with your files correctly:
- public_html — This is the main web root folder. Any files you place here are accessible via your primary domain name. Your website's
index.htmlorindex.phpshould live here. - domains — Contains subfolders for each addon domain you have added. Each addon domain has its own
public_htmlsubdirectory inside this folder. - private_html — Used for HTTPS-only content; typically mirrors
public_htmlin most setups. - mail — Stores incoming email messages for your email accounts.
- logs — Contains access logs and error logs for your website.
- backups — Where DirectAdmin stores account backup archives.
Uploading Files and Folders
To upload files to your hosting account, navigate to the target folder (usually public_html) and click the Upload button in the toolbar. A file selection dialog will appear, letting you choose files from your local computer. You can select multiple files at once by holding Ctrl (Windows) or Command (Mac) while clicking.
For uploading entire folders, it is best to compress the folder into a ZIP archive first, upload the ZIP file, and then extract it on the server using the File Manager's built-in extract feature. This is much faster than uploading individual files one by one.
Creating, Deleting, and Renaming Files
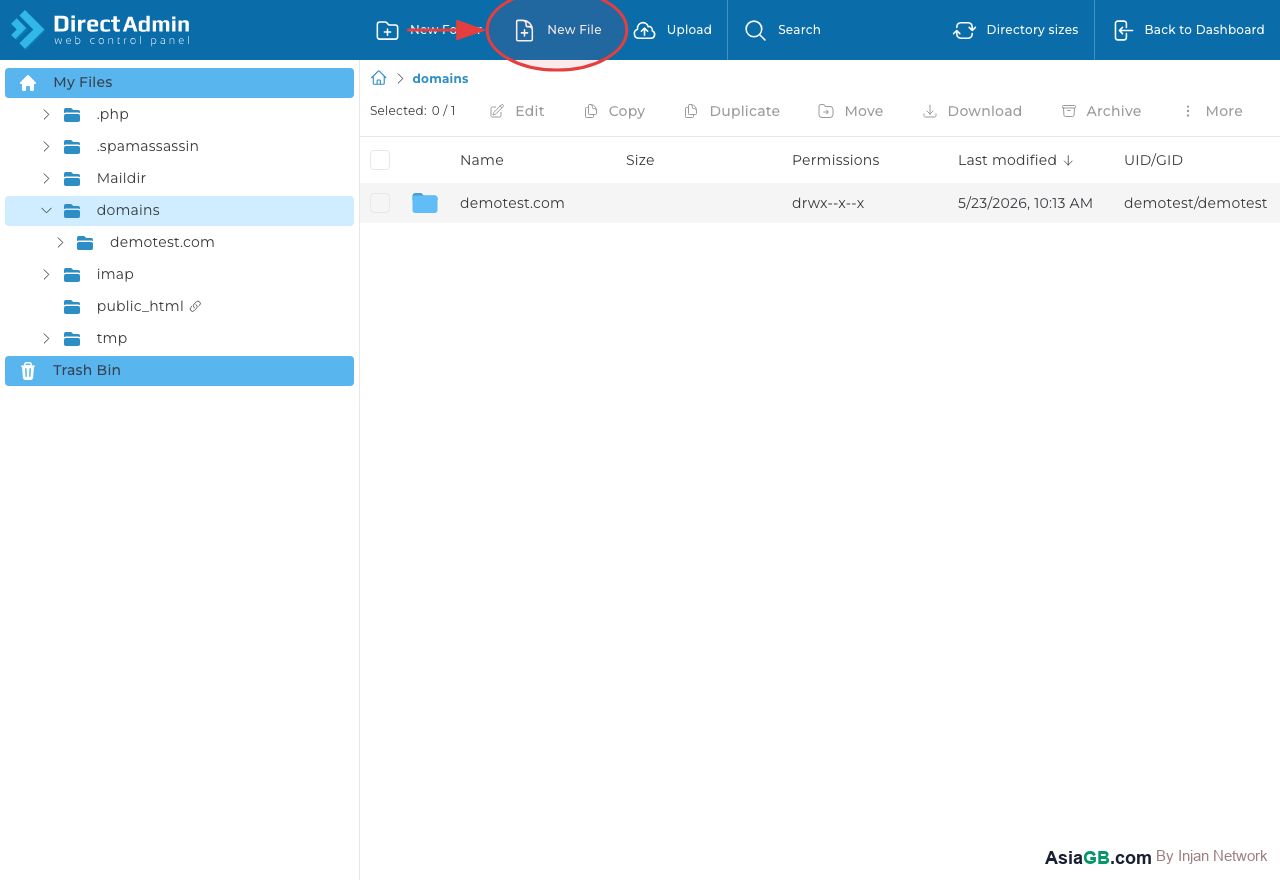
The File Manager toolbar includes buttons for creating new files and folders. To create a new file, click New File, enter the file name (including its extension such as .html or .php), and click Create. The file will appear in the current directory immediately.
To delete a file or folder, check the checkbox next to it and click Delete. To rename a file, right-click on it (or use the context menu) and select Rename, then type the new name and confirm.
Editing Files with the Built-In Code Editor
One of the most useful features of the DirectAdmin File Manager is the built-in text and code editor. To edit a file, simply click on its name. The editor will open the file and display its contents with basic syntax highlighting for HTML, PHP, CSS, and JavaScript files.
You can make your edits directly in the browser and then click Save to apply the changes. The updated file is saved to your server immediately — no need to download, edit locally, and re-upload.
Changing File Permissions (chmod)
File permissions control who can read, write, and execute each file on your server. Incorrect permissions can cause your website to display errors or prevent scripts from running. To change permissions in the File Manager, right-click a file or folder and select Change Permissions (or chmod). A dialog will let you set the permission values using checkboxes or by entering the numeric value (such as 644 for files or 755 for folders).
Common permission values to remember:
- 644 — Standard permission for most web files (owner can read/write, others can read)
- 755 — Standard permission for folders and executable scripts
- 600 — Secure permission for sensitive config files (only owner can read/write)
Compressing and Extracting ZIP Archives
The File Manager supports creating and extracting ZIP and TAR.GZ archives directly on the server. To compress files or folders, select them with the checkboxes and click Compress. Choose your archive format (ZIP is most common) and click Create. The archive will be saved in the current directory.
To extract an existing archive, click on the archive file name and select Extract. The File Manager will unpack all files into the current directory. This is the fastest way to deploy a website — upload one ZIP file and extract it in seconds.
The compress and extract features are especially useful for WordPress installations, which can contain more than 10,000 individual files. Uploading a compressed archive takes a fraction of the time compared to transferring files one by one. After extraction, the full site structure is recreated automatically on the server, preserving all folders and subfolders exactly as they were.
Setting the Correct File Permissions (chmod)
File permissions (commonly called chmod values) determine who can read, write to, or execute each file on your server. Incorrect permissions are one of the most common reasons websites display errors — for example, a WordPress site returning a 500 Internal Server Error or an image upload failing because the uploads directory is not writable.
The three standard permission values you need to know for web hosting are:
- 644 — For regular files. The file owner can read and write; everyone else can only read. Use this for HTML, CSS, JavaScript, image files, and most PHP files.
- 755 — For directories and executable scripts. The owner can read, write, and execute; others can read and execute but not write. All directories on your hosting account should normally be set to 755.
- 600 — For sensitive configuration files. Only the file owner can read and write; no one else has any access. Use this for files like
wp-config.php,.env, or any file containing database passwords or API keys.
To change permissions using the File Manager, right-click on the file or folder you want to modify and select Change Permissions. Enter the numeric value (e.g., 644) or use the checkboxes to set Owner/Group/Other permissions visually, then click Apply. You can also select multiple files at once and apply the same permission value to all of them in a single step.
Never set a directory to 777 (read, write, and execute for everyone). While it might fix a temporary permission error, it leaves your files open to modification by any other process running on the server, creating a serious security vulnerability. Always use the minimum permission level that makes your application work correctly.
When to Use File Manager vs FTP vs SSH
Each file management method has its strengths. Understanding when to use each one saves time and helps you work more efficiently.
Use File Manager when:
- You need to make a quick one-line edit to a configuration file (such as
.htaccess,wp-config.php, or arobots.txtupdate) without setting up a separate FTP connection. - You are working from a shared or unfamiliar computer that does not have an FTP client installed.
- You need to extract a ZIP archive that you have just uploaded to the server.
- You need to inspect or change the permissions of specific files after a deployment.
- You want to create a new blank file or folder quickly.
Use FTP (FileZilla or similar) when:
- You need to upload or download a large number of files at once — FTP clients handle bulk transfers more reliably than a browser.
- You want to synchronize your local development folder with the live server, with a visual side-by-side comparison.
- You are uploading a single large file (over 100 MB) where browser-based upload might time out.
- You want the ability to resume an interrupted upload without starting over from scratch.
Use SSH when:
- You need to run command-line tools such as
composer install,npm run build, orgit pull. - You need to import a large SQL database file using the MySQL command-line client.
- You want to set up or debug a cron job, or monitor real-time error output with
tail -f error_log. - You need to perform bulk operations across thousands of files using commands like
find,chmod -R, orgrep -r. - You are troubleshooting server-level issues that require direct access to logs, processes, or system configuration.
In practice, experienced web administrators use all three methods depending on the task. The File Manager is ideal for everyday quick fixes, FTP is the workhorse for large file transfers, and SSH gives you the full power of the Linux command line for complex operations.
Pro Tip: Use the File Manager to edit configuration files (like wp-config.php or .htaccess) when FTP access isn't available or when you need to make a quick one-line fix without setting up a full FTP connection. It's the fastest way to troubleshoot configuration issues remotely.
Hosting with DirectAdmin File Manager
AsiaGB hosting includes DirectAdmin with full File Manager access — manage your website files anytime, anywhere.
View Hosting Plans