
An autoresponder is one of the most useful email tools available in DirectAdmin. Whether you need to acknowledge customer inquiries instantly, inform senders that you are on holiday, or provide automatic confirmation when someone contacts your business, autoresponders handle it all without any manual effort. This guide covers everything you need to know to set one up correctly.
What Is an Autoresponder?
An autoresponder is an automated reply that is sent immediately whenever a message arrives at a specific email address. As soon as the server receives an email, it automatically sends your pre-written response back to the sender — without you needing to do anything.
Autoresponders in DirectAdmin are attached to specific email accounts. You configure the reply message, subject line, and optionally a date range during which the autoresponder will be active. Outside that date range, it stays silent.
When to Use Autoresponders
Autoresponders are appropriate in many business and personal situations:
- Acknowledging receipt of a customer inquiry and promising a follow-up within a set timeframe
- Notifying senders that you are out of the office or on vacation
- Providing automatic replies with frequently requested information (office hours, location, support links)
- Confirming that an order or support ticket has been received
- Sending a welcome message to new subscribers or contacts
How to Set Up an Autoresponder
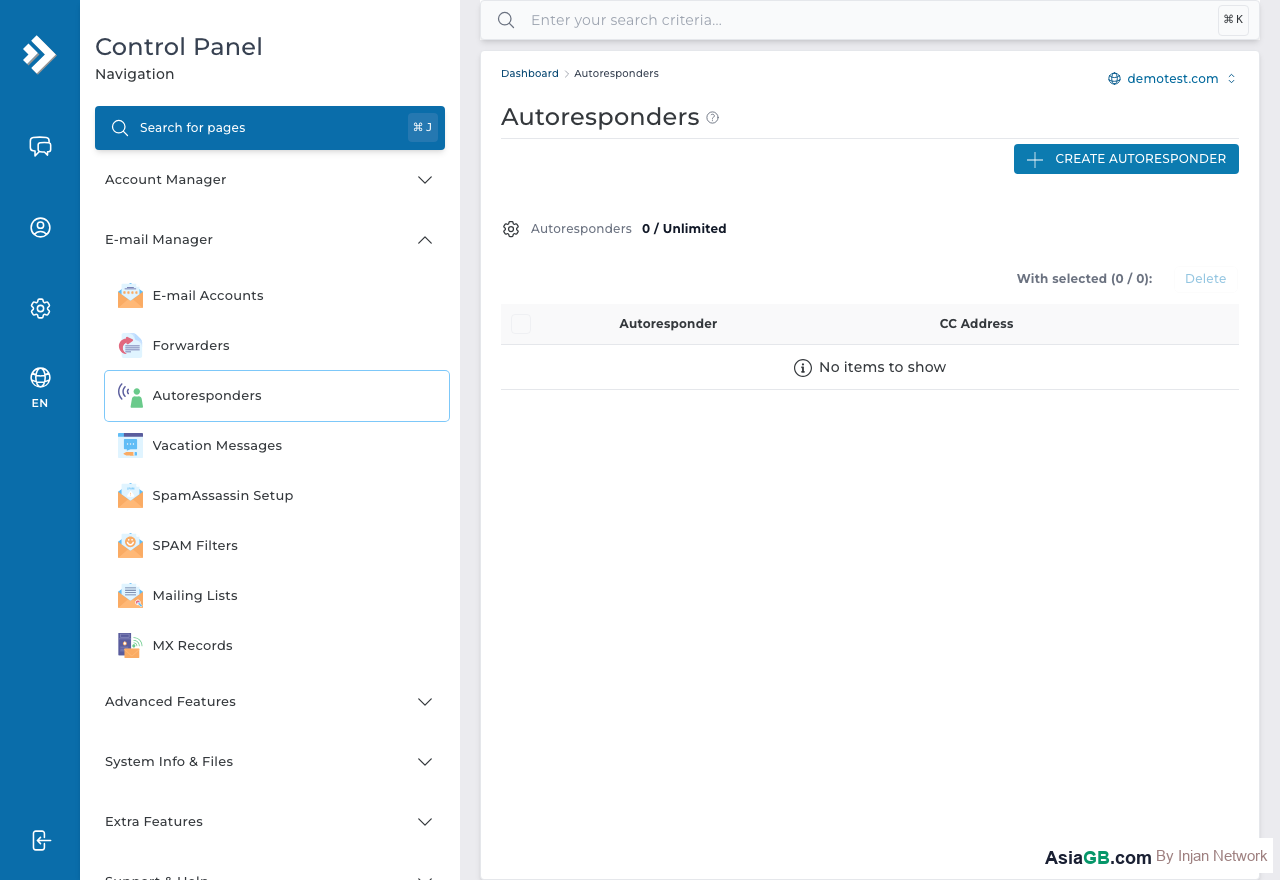
- Log in to DirectAdmin and go to Email Manager.
- Click on Autoresponders.
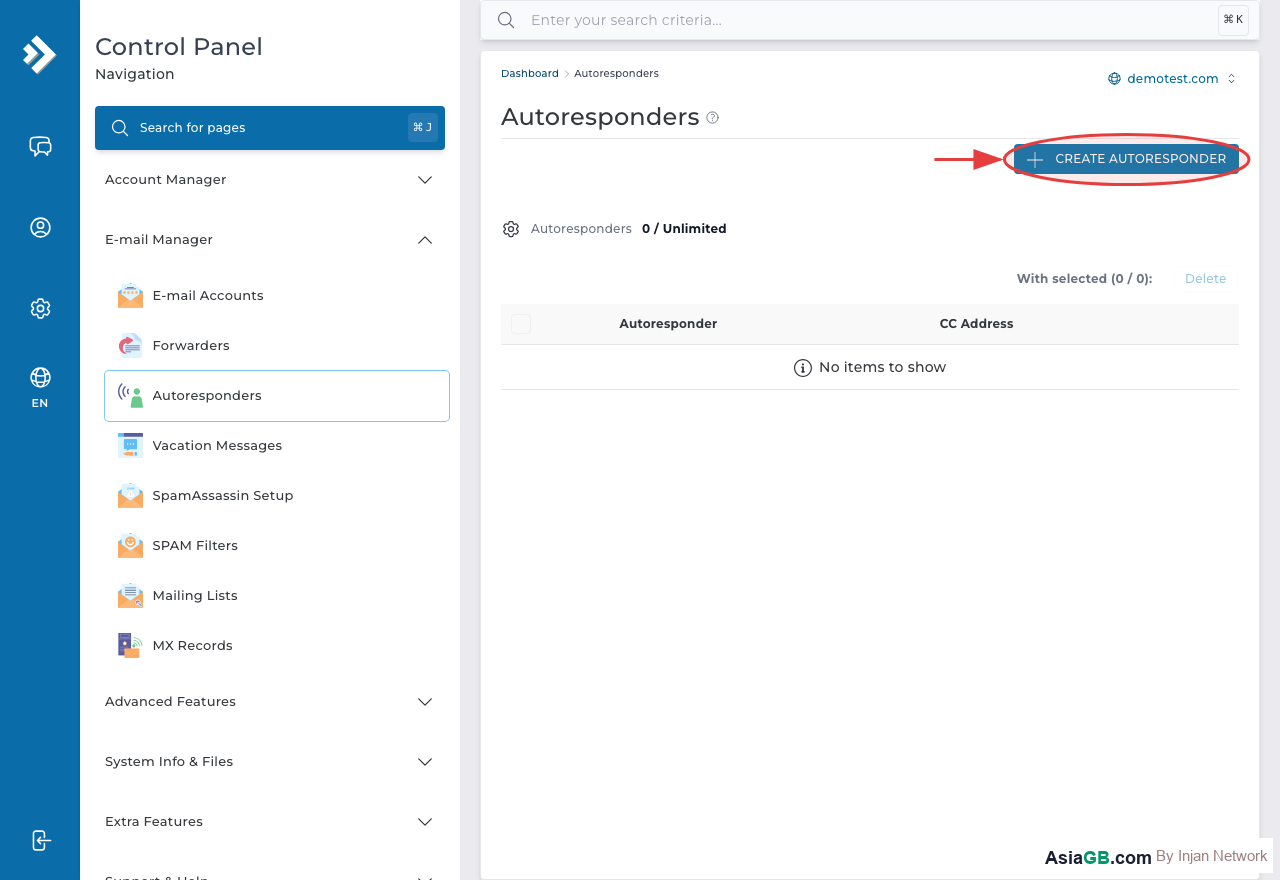
- Click Add Autoresponder or the + icon.
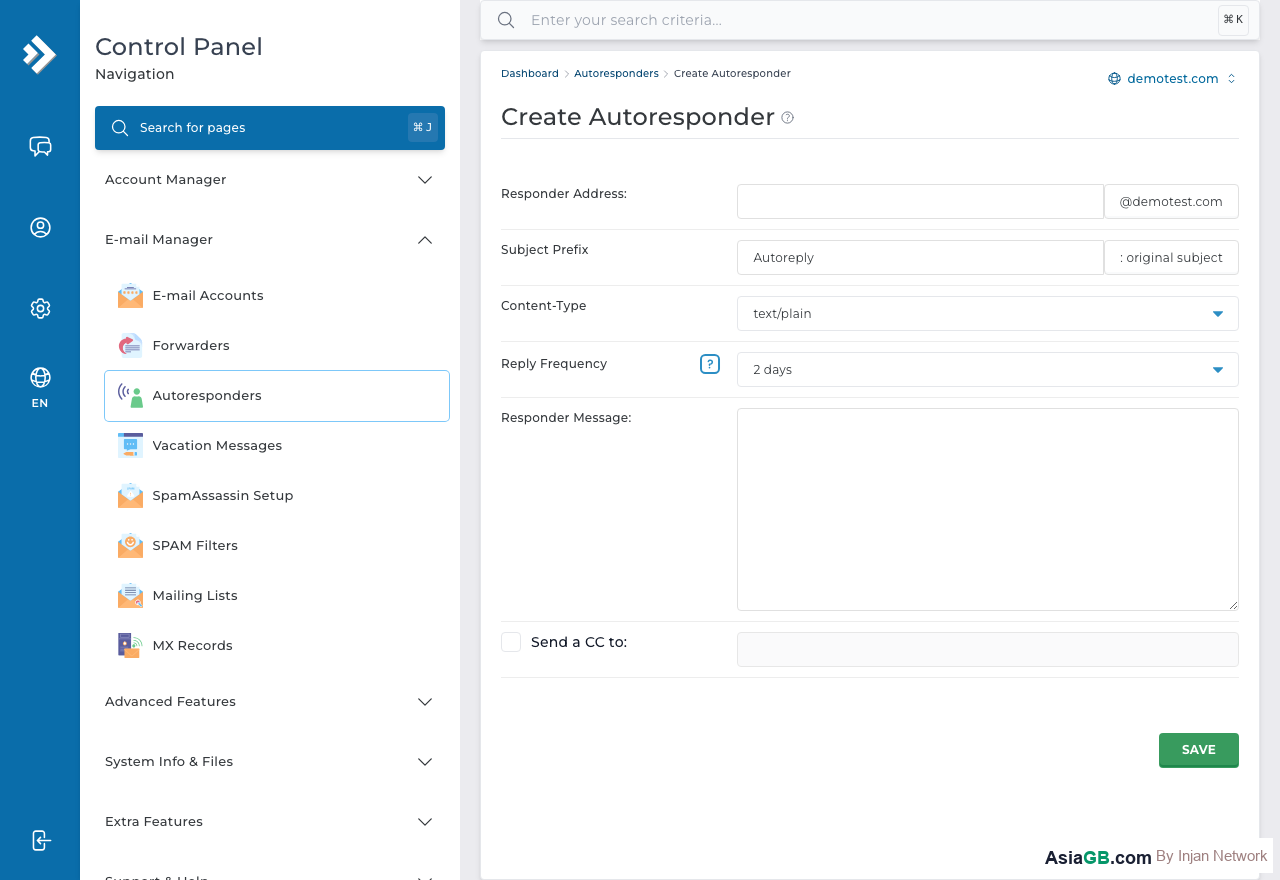
- In the Email field, select or enter the email address that should trigger the autoresponder (e.g.,
[email protected]). - Fill in the Subject line for the automatic reply (e.g., We have received your message).
- Enter the From Name — this is the display name that will appear as the sender of the auto-reply (e.g., AsiaGB Support Team).
- Write your reply message in the Message Body field.
- Click Save. The autoresponder is now active.
Setting Start and End Dates
If you only want the autoresponder to be active for a limited period — such as during a holiday — you can define a start date and an end date. DirectAdmin will activate the autoresponder at the start date and automatically disable it after the end date, so you don't have to remember to turn it off manually.
To set dates, look for the Start Date and End Date fields when creating or editing the autoresponder. Leave them blank if you want the autoresponder to run indefinitely until you disable it manually.
HTML vs Plain Text Messages
DirectAdmin autoresponders support both plain text and HTML formatted messages. Plain text is simpler and is guaranteed to display correctly in every email client. HTML allows you to add formatting, links, and a more professional visual layout — useful for branded business replies. If you choose HTML, make sure to tick the HTML checkbox in the autoresponder settings before saving.
How to Disable or Delete an Autoresponder
To turn off an autoresponder without deleting it permanently, edit the autoresponder and adjust the end date to a past date, or simply remove the message content. To delete it entirely, go to Email Manager → Autoresponders, check the box next to the autoresponder, and click Delete Selected.
Sample Autoresponder Message for Business
Here is a simple, professional template you can adapt for your own use:
Subject: Thank you for contacting us — We have received your message
Thank you for getting in touch with us. This is an automated confirmation that we have received your email and will respond within 1–2 business days. If your matter is urgent, please call us at +66-XX-XXX-XXXX during business hours (Monday–Friday, 9 AM–6 PM). Best regards, [Your Company Name] Support Team.
Best Practices for Writing Effective Autoresponder Messages
The message recipients receive from your autoresponder reflects your professionalism. A well-written autoresponder builds trust, while a vague or confusing one may cause frustration. Here are key guidelines for crafting effective auto-replies:
- State the response timeframe clearly. Tell the sender when to expect a real reply — for example, "Our team will respond within 1–2 business days." This prevents follow-up emails from people who are unsure whether their message was received.
- Keep the message concise. An autoresponder should be 3–5 sentences at most. The sender only needs to know that their email was received and when they will hear back. Long autoresponders feel impersonal and are often skimmed or ignored.
- Include alternative contact options. If there is a faster channel available — such as a phone number for urgent matters or a live chat link — mention it so time-sensitive requests can be handled promptly.
- Personalise with your brand name. End the message with your company name and team name so the recipient knows exactly who they are dealing with. Avoid generic sign-offs like "The Team" alone.
- Use a professional subject line. Instead of just "Auto Reply," use something like "We received your message — reference #12345" so the recipient can easily track the correspondence.
Testing Your Autoresponder Before Going Live
Before activating an autoresponder on a real business email address, take a few minutes to test it thoroughly:
- Send a test email from a different email address — ideally a personal Gmail or other external account — to the address you configured the autoresponder on.
- Check that the auto-reply arrives within a minute or two. If it does not arrive, verify that the autoresponder is saved correctly in DirectAdmin and that the email account is active.
- Review the subject line, sender name, and message body in the received auto-reply to confirm they look exactly as intended.
- Send a second test email from the same address. If you set Times = 1, the autoresponder should not fire again for the same sender within the configured window.
- Check the spam folder of your test account — if the auto-reply lands in spam, adjust the message content or subject line to reduce spam scoring.
Avoid Autoresponder Loops: Never configure an autoresponder to reply to mailing lists, newsletters, or bulk senders. Many automated email systems will respond to your auto-reply, triggering an infinite loop of messages. DirectAdmin handles this by not sending autoresponders to addresses that contain no-reply, mailer-daemon, or similar patterns — but always double-check your settings and test with a real sender before going live.
Professional Email Hosting for Your Business
AsiaGB hosting plans include full email features — autoresponders, forwarders, Webmail, and more on your own domain.
View Hosting Plans